Ultrasonic TapeMeasure
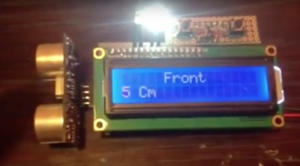
Hello again ,This one is an old project that uses Ultrasonic sensor and Arduino and the cheapest available parts on the market to make an ultrasonic measuring device with a maximum measuring distance ot 4 meters and unit of measurement 1 cm. The whole device will cost you about 10 ot 15 USD to make …All the parts are from ebay except the pcb board and the small elements that you can find in any local electronics store.Because it was done a while ago when I was just starting with Arduino the code is very primitive but it works.You can use it or edit it or do whatever you want with it. The device itself is somewhere at home so when ,or if I have the time I will make detailed pictures and add them here .
If you are inpatient and don’t want to watch the videos ,the full code is just after the videos at the bottom of the page.All the connections you should make between the devices are described in the code itself.
Excuse me if something is missing the original comments I have made in my native language so I had to translate them and something may have gotten lost.
This was the first try at getting it to work
This is the more updated version created a while after the first tests
FULL CODE FOR THE DEVICE FROM THE SECOND CLIP FROM HERE ON:
#include <LiquidCrystal.h>
int buttonPin = 9;
int ledPin = 8;
int ledPin2 = 7;
int pingPin = 10;
int inPin = 13;
long microseconds;
long CM;
long cm;
char* topRow[]= {“Welcome to… “,”Full”,”Front”,”Ultrasonic Line”} ;
LiquidCrystal lcd(12, 11, 5, 4, 3, 2); //Pins to attach to the display
/*
How to connect the Display-a :
* LCD RS to digital pin 12
* LCD Enable to digital pin 11
* LCD D4 to digital pin 5
* LCD D5 to digital pin 4
* LCD D6 to digital pin 3
* LCD D7 to digital pin 2
* LCD R/W to digital pin 0 (GND)
10K Trimmer or petentiometer is connected to :
* +5V and 0 (GND) – The rightmost and the leftmost legs of the ellement
* The middle pin of the element to LCD VO (pin 3)
It’s important to connect because it defines the polarization of the display. How dark or light are the letters It won’t work if not connected
*/
void setup () {
pinMode (buttonPin ,INPUT);
pinMode (ledPin ,OUTPUT);
pinMode (ledPin2 ,OUTPUT);
lcd.begin (16,2);
lcd.setCursor (2,0);
lcd.print (topRow[0]);
lcd.setCursor (0,1);
lcd.print (topRow[3]);
digitalWrite (ledPin ,HIGH);
delay (300);
digitalWrite (ledPin2,LOW);
delay (300);
digitalWrite (ledPin2,HIGH);
delay (300);
digitalWrite (ledPin,LOW);
delay (300);
digitalWrite (ledPin ,HIGH);
delay (300);
digitalWrite (ledPin2,LOW);
delay (300);
digitalWrite (ledPin2,HIGH);
delay (300);
digitalWrite (ledPin,LOW);
delay (500);
lcd.clear();
}
void loop () {
long duration, inches;
digitalWrite(pingPin, LOW);
delayMicroseconds(2);
digitalWrite(pingPin, HIGH);
delayMicroseconds(10);
digitalWrite(pingPin, LOW);
delayMicroseconds(2);
pinMode(pingPin, OUTPUT);
pinMode(inPin, INPUT);
duration = pulseIn(inPin, HIGH);
cm = microsecondsToCentimeters(duration);
if (digitalRead (buttonPin) == HIGH)
{
lcd.setCursor (5,0);
lcd.print (topRow[1]);
lcd.print (” “);
digitalWrite (ledPin ,HIGH);
digitalWrite (ledPin2,LOW);
CM = (cm+2)+10;
}
else {
lcd.setCursor (5,0); //Избира се позицията от която да изпише string-a
lcd.print (topRow[2]) ; //Избира се необходимия String
lcd.print (” “); //Празни символи за да няма примигване на екрана с lcd.clear
digitalWrite (ledPin2 ,HIGH); //Включи Led2
digitalWrite (ledPin ,LOW); // Изключи Led1
CM = (cm + 2); //Добавя 2 Cm като това е,
// челния размер с корекцията за точност
}
lcd.setCursor (0,1);
lcd.print (CM);
lcd. print (” “);
delay(100);
lcd.print (“Cm”);
lcd.print (” “);
delay(150); }
long microsecondsToCentimeters(long microseconds)
{
return microseconds / 29 / 2;
}