RaspBerry PI 2 Bottle Web Server
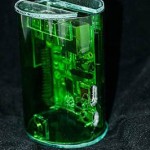
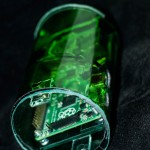
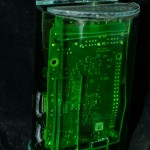
How to make a case like this:
What you need : Beer bottle (500ml) , Piece of glass (50×50 cm x 3mm should be more than enough), Transparent glass glue (UV hardening or normal) ,Glass cutter (the cheapest you find in the hardware store with metal cutting wheel), You will need a tool with diamond bit to make the holes for the HDMI and USB connectors,You will need 2 screws and 2 nuts( the smallest you can find 2,5mm x 20mm is the best if you find 3mm x 20mm you will have to drill the Raspberry a bit),4 small magnets .
I use a tool similar to the DREMEL tool that is super popular over the internet. Always wear protective glasses and gloves while working with glass.
First you will have to cut the bottle so you can use the glass tube that will be left after the cutting.Measure your Raspberry .The piece of bottle should be no more than 10 mm bigger that it .
Look at this clip on how to do it
If you don’t know how to cut glass look at the video below.
How to assemble it :
Try to put the Raspberry inside the bottle and check if it fits well .On some bottles you may have to sand down the front of the Audio/Video connector.
After that measure the inside of the bootle while the Raspberry is in the bottle to estimate what size of glass piece you will have to cut to hold your Raspberry in place.
Now you should glue the glass piece inside the bottle.Be careful the glass piece shouldn\’t protrude from any of the ends.If your glue is UV curing bake it now if not wait for it to settle.
After that place the 2 screws in the Back wholes of the board of the RaspBerry(close to the SD card) with the heads facing downwards and the nuts just to hold them in place…Don\’t tighten too much ,the nuts should just be on the screws to prevent them from falling off.
Put some glass glue on the heads of the screws …Be careful not to mess this up.This will be responsible for holding your RaspBerry in the case.
Put the board inside and take a close watch that the heads of the screws are touching the glass beneath them. Bake the glue with UV light or wait for it to harden in place
While the Raspberry is in the bottle using a marker and looking from the side just mark where to drill the holes for the USB and HDMI connectors.
Unscrew the nuts carefully using tweezers and gently remove the raspberry out of the glass.
Now you will have to drill the wholes in the now ready glass tube and after that round all the edges on the tube and on the hexagons (circles) with a knife sharpening stone (it works as sandpaper on the glass).
After the holes are ready place the RaspBerry in the tube again.Screw the nuts on the screws to hold the board in place.
Take the hexagon or circle piece of glass and place it on the tube covering the side with the connectors. With a marker ,mark the piece that will have to be cut to have access to the ports (LAN and USB)
Before doing this check if the board isn\’t moving up and down and if it is you may glue another piece of glass as you can see in my pictures just to hold the board down additionally.You can use the piece of glass from the next step
Take the marked piece of glass and cut it in three .Discard the middle piece and glue to other two in place.
You may use or don’t use back cover.If you don’t you are ready .
If you want to use back cover you will have to do some additional gluing and use the four magnets.
First cut two pieces off glass 10 x 10 mm each.
Measure the thickness of the bottle you have .
Measure the magnets you have.
Glue the pieces of glass to the last circle or hexagon left with enough distance to fit the magnets inside.
My magnets are 5 mm thick so 2 x 5mm = 10 mm +thickness of the bottle (6mm) .I glued the pieces of glass 16 mm from the edge in .
Both pieces of glass should be 16 mm from their edges. Makes sure you place them in the middle of the circle circumference .
After that glue one magnet on the small piece of glass and one magnet on the inner side of the bottle.Repeat this for both sides.
Be carefull magnets have polarity . Watch out to not place repelling magnets sides facing one another.
After you have finished gluing everything you should be able to just place the cover and it will click into place .
Please be very careful and always round all the edges and wear some gloves to avoid cutting yourself.
FOR THE SOFTWARE PART LOOK BELOW
This webpage is was hosted on a RaspBerry Pi2 server using LAMP configuration and WordPress until a hardware issue by my fault took the whole website after 6 months of nonstop operation.
More info on how to setup the software at : The official page of the Raspberry foundation